
High Performance Aviation
“Descend Pilot’s Discretion”
By Chris Reed, CFI, CFII, MEI
Descent Planning with the Garmin G1000
Airplanes are one of only a few types of vehicles that can truly operate in three dimensions. Because of this, the pilot must be able to plan his or her flight in order to arrive in the correct place (lateral navigation) at the appropriate altitude (vertical navigation). Poor descent planning may result in having to use abnormal techniques in order to land. Fortunately, good descent planning is not difficult. In fact, there are a number of ways to do it correctly. Let’s start by looking at a couple of methods that don’t use electronic assistance. We will finish by looking at how to use the Garmin G1000 to make your descent planning a cinch.
Mental Math Method
The first method that most pilots learn is the mental math method. Here is an example: A pilot is flying west in his Cessna 172 at 8,500’ MSL. His destination airport is at around 500’ MSL. Assuming the pattern altitude is 1,000’ AGL, the pilot has 7,000’ to lose. If the pilot chooses to descend at 500 fpm, the descent will take 14 minutes. Knowing his estimated time of arrival, the pilot can start his descent 14 minutes out. You may choose to add a minute or two to this time to ensure that you don’t have to make a descending entry into the pattern.
If you prefer to work with miles, you can use your groundspeed to determine how far out to start your descent. This method is useful for marking a top of descent point on your chart during your preflight planning. Using an estimated groundspeed of 120 knots, it is simple to determine that the airplane travels 2 miles a minute (120 knots/60 minutes). Therefore, the top of descent point will be 28 miles from the destination (14 minutes x 2 miles per minute). Your GPS can easily tell you when you are 28 miles out. I recommend that you practice this method using your own aircraft’s performance numbers.
E6B Method
Another method for vertical navigation planning involves the E6B. Here is the setup:
Using the numbers in the original example, you set the rate arrow under 120 knots and find the intended descent rate of 500 fpm on the outer circle. Under 500 fpm on the outer circle you read 250 feet per mile on the inner circle. At this point, you’ve probably noticed that you really have to put the arrow under 12 for 120 knots and read 50 as 500 fpm and 25 as 250 feet per mile. I hope you are following along on your E6B to see what I mean. At 250 feet per mile it will take 4 miles for each 1,000 feet we have to lose. Since we have 7,000 feet to lose, we need to start our descent at 28 miles out (4 nm x 7). You can also do division on your E6B to avoid all mental math! Simply place 7,000 feet over 250 feet per mile (70 over 25 on your E6B). Find the number 10 on the inner circle, and read the number of miles required on the outer circle. Again we get 28 miles; imagine that!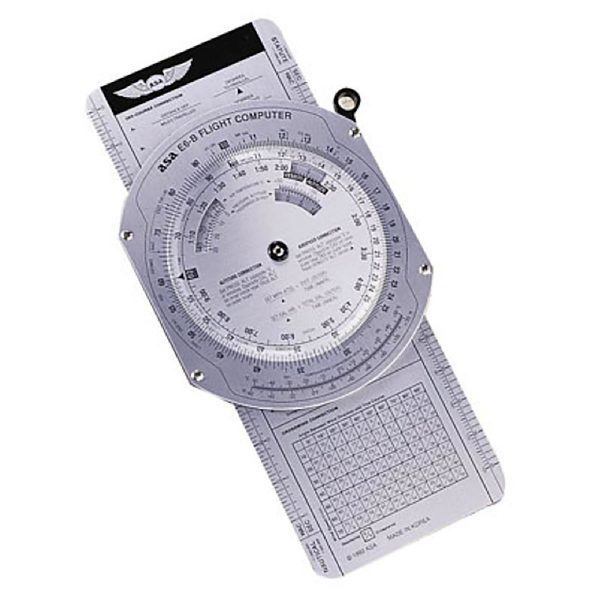
VNAV – Descent Planning with the Garmin G1000
Take a deep breath; we are done talking about math for the time being. Now let’s look at how the Garmin G1000 can simplify your vertical navigation. Take a look at the picture below.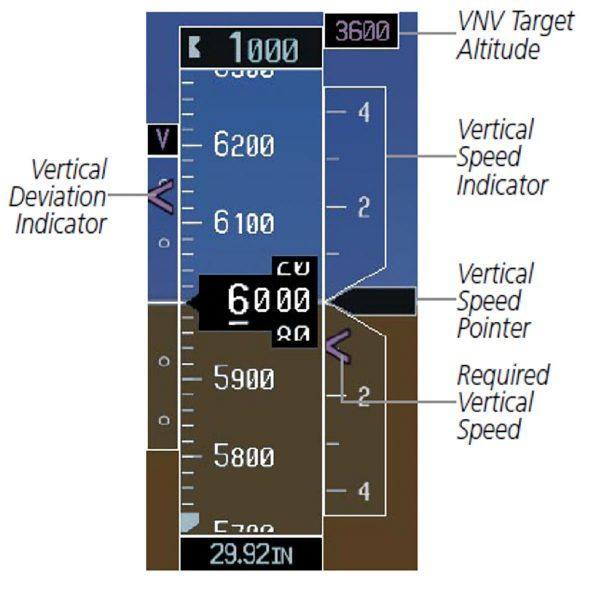
The vertical deviation indicator shows whether you are above or below your intended descent path. In the picture above, the pilot is below his or her desired path. The required vertical speed indicator shows what rate of descent is required to reach the target altitude at the intended location. In the picture above, the required vertical speed is around 1000 fpm. All the pilot has to do is begin a descent to place the vertical speed pointer in the required vertical speed indicator and follow the vertical deviation indicator down much like the glideslope on an ILS. It can’t get much easier than that, so let’s figure out how to set it up.
Direct-To VNAV
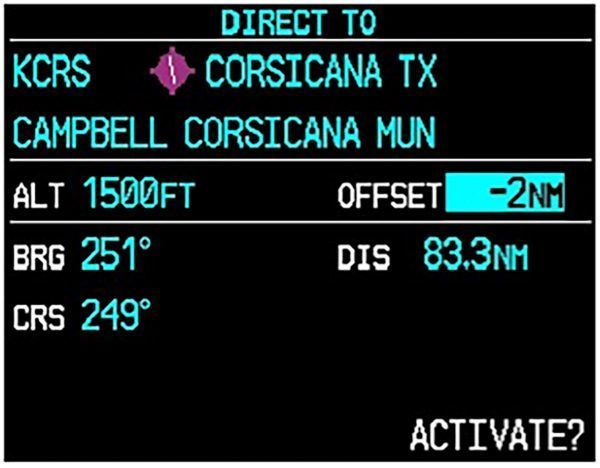
My first example involves the DIRECT TO feature of the G1000. I used the PFD, but you can use the MFD to accomplish the same thing. First, pull up the direct to window. Now, enter your desired destination. Use the FMS knob to scroll down and enter an altitude. I entered 1,500 feet for a pattern altitude. Now scroll over to OFFSET. I set a -2 nm offset. This means that the G1000 will give me vertical guidance to reach 1,500 feet 2 miles before reaching the Corsicana airport: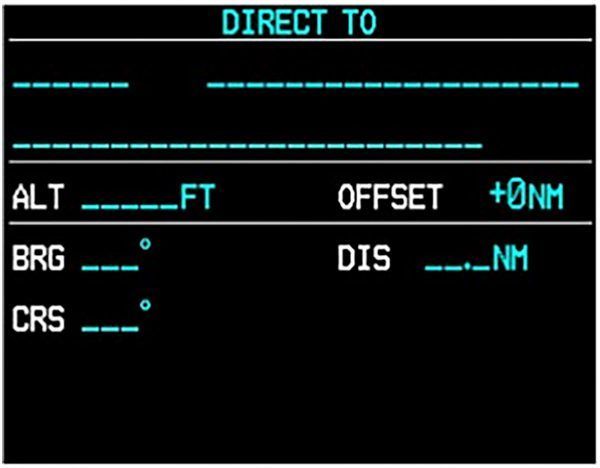
After activating the direct to function, you can edit the VNAV settings on the MFD flight plan page. Use the VNV PROF softkey to put your cursor in the CURRENT VNV PROFILE box. You can then change the VS TGT to your desired rate of descent, or you could change the FPA (flight path angle) to a different descent angle. I set the VS TGT to use a 500 fpm descent: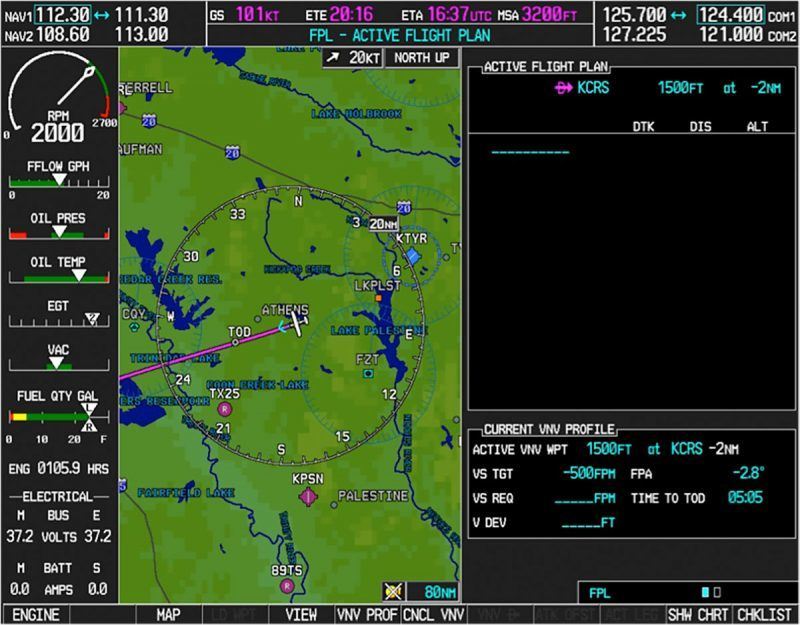
The G1000 labels your top of descent as TOD on the MFD map, showing you where you will start your descent. The orange and black box near Corsicana is the point 2 nm before the airport that I set earlier: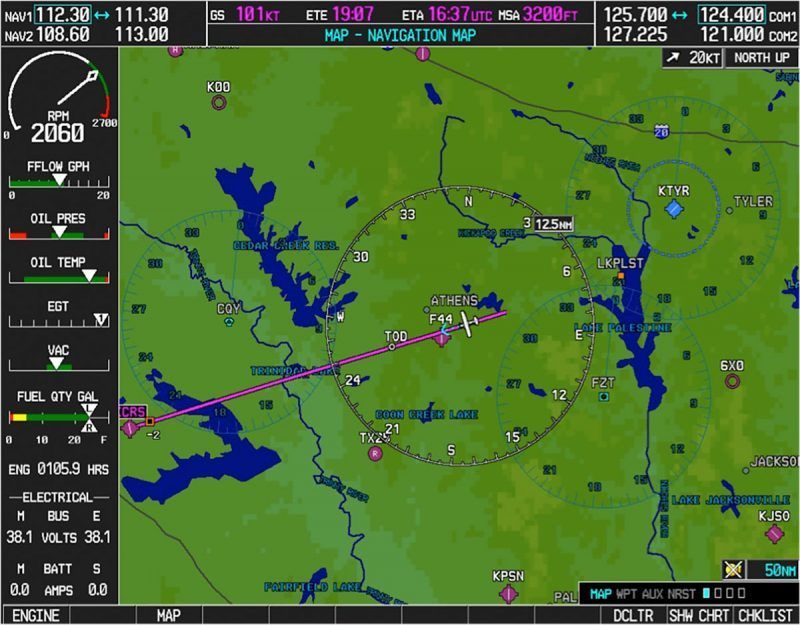
Flight Plan VNAV
The next three pictures show how to use the flight plan page of the MFD to set up vertical navigation. First, I set up a flight plan from F44 to KCRS: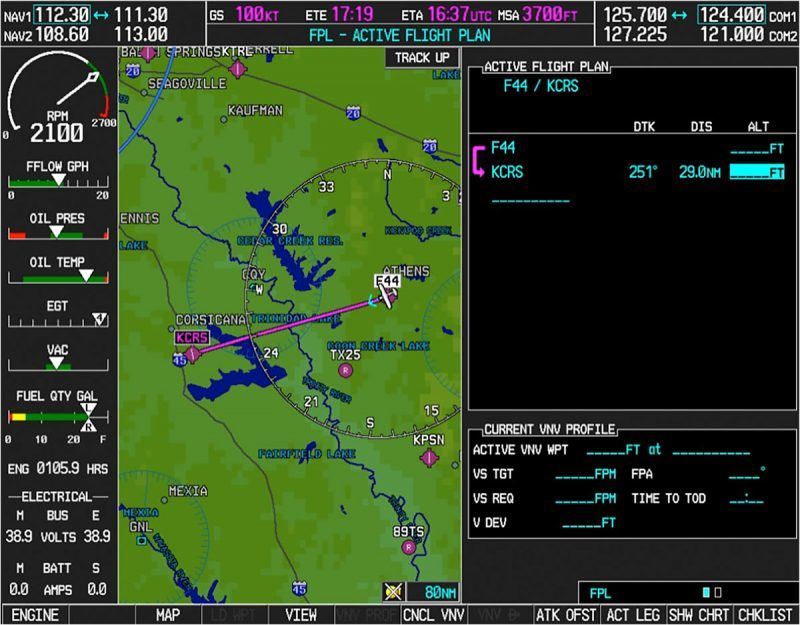
Once you have the flight plan set up, highlight the altitude column for your destination and press the ATK OFST softkey. This allows you to make your descent to a point along your track (ATK) that is before your destination rather than reaching your desired altitude directly over the field. Again, I used a 2 nm offset: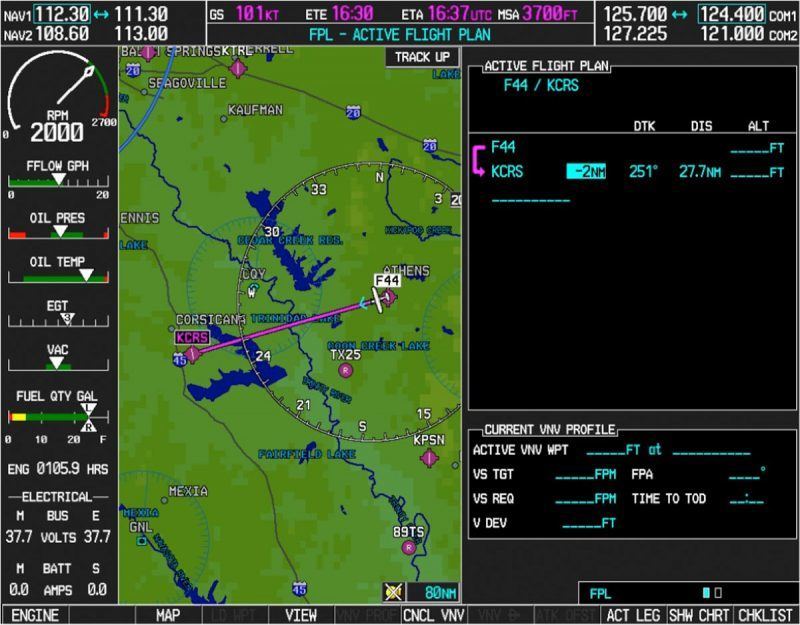
Once you press enter, the G1000 adds a new waypoint to your flight plan. Use the FMS knob to set your desired altitude. I set 1,500 feet (then press enter):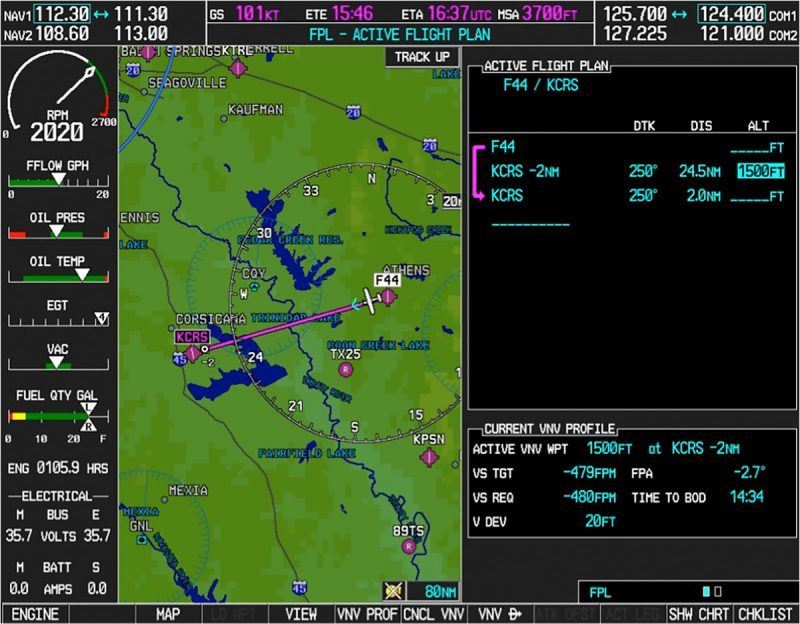
Now you are done. Again, you may edit the VNV PROFILE by pressing the VNV PROF softkey. You can turn off vertical navigation at any time by pressing the CNCL VNV softkey. Next time you are on a cross country, give it a try.
Would you like more information?
Send us a message below.

MEET HPA
FOLLOW US