High Performance Aviation
“Cleared As Filed”
By Chris Reed, CFI, CFII, MEI
IFR Flight Plans on the G1000
The Instrument Flying Handbook states that situational awareness is simply “knowing what is going on” (1-14). The Garmin G1000 is a great tool to help maintain situational awareness on an IFR flight. In order to fully realize the system’s potential, however, the pilot must be able to load an IFR flight plan on the G1000 that matches his or her route exactly. This includes the ability to load a departure, an airway, and an arrival. This training article will cover these topics as well as how to store a flight plan in the G1000 and recall it from the database. Our sample IFR flight will take us from Dallas Love (KDAL) to New Orleans Lakefront (KNEW).
Choosing the Route
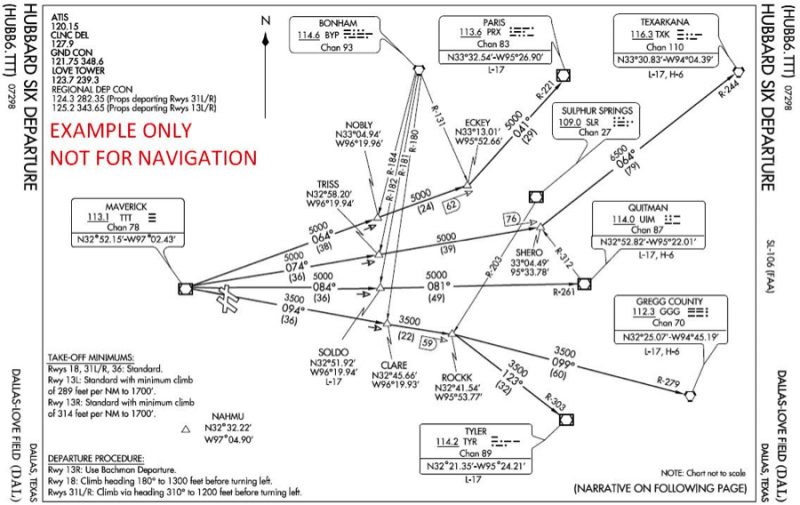
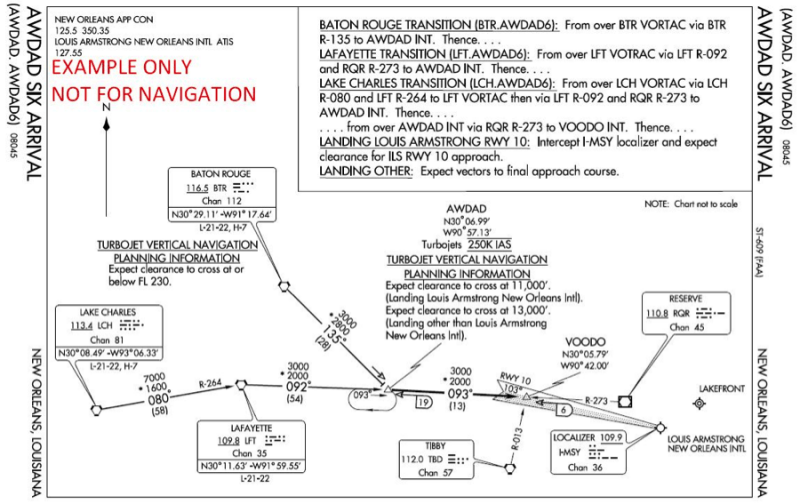
Looking at the Terminal Procedures Publication (available electronically at aeronav.faa.gov) shows that there are departure procedures (DPs) for Dallas Love and standard terminal arrival routes (STARs) for New Orleans Lakefront. I chose the Hubbard Six departure with the Longview transition and the Awdad Six arrival with the Baton Rouge transition. These procedures fit in well with our direction of flight. They do not have prohibitively high altitudes or any notes precluding us from using them. Pictures of the chosen procedures are below.
To complete our route, we need to connect the departure to the arrival. Looking at the IFR low altitude en route chart shows that there are several restricted areas near Alexandria, Louisiana. Because of this, I chose to use a victor airway in my route to simplify my planning. V114 runs from the Gregg County VOR (the terminating point of the Hubbard Six departure) to the Baton Rouge VOR (the starting point of the Awdad Six arrival). It doesn’t get much easier than that! To summarize, our chosen IFR route as it will be filed is HUBB6.GGG V114 BTR.AWDAD6. Now let’s find out how to put our IFR flight plan in the G1000.
Loading a Departure
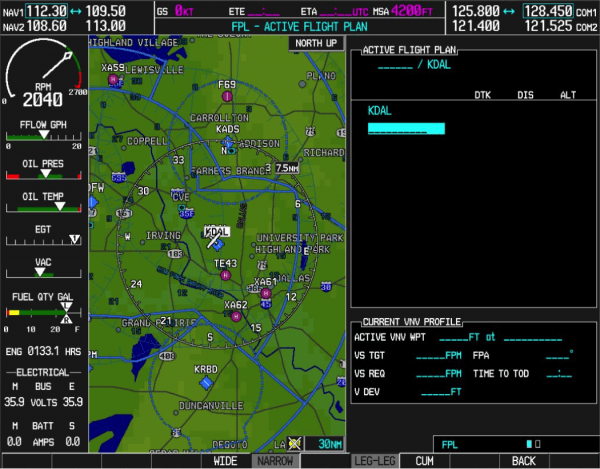
You may load a departure using the primary flight display (PFD) or the multifunction display (MFD). I chose to use the multifunction display for this example. Press the FPL key on the MFD. If the departure airport is not already on the first line, use the FMS knob to enter KDAL and press the ENT key.
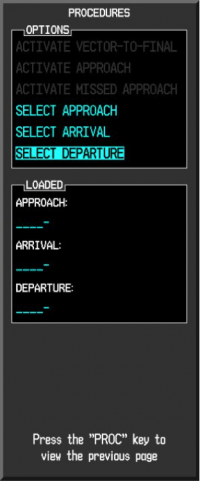
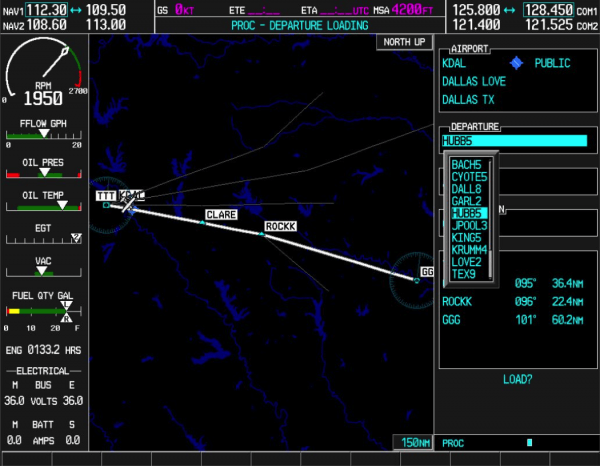
Now press the PROC key. The following window will appear. Use the large FMS knob to highlight SELECT DEPARTURE, and press the ENT key.
Use the FMS knob to highlight the desired departure. Press the ENT key. Notice that our G1000 simulator does not contain the latest revision to the desired departure.
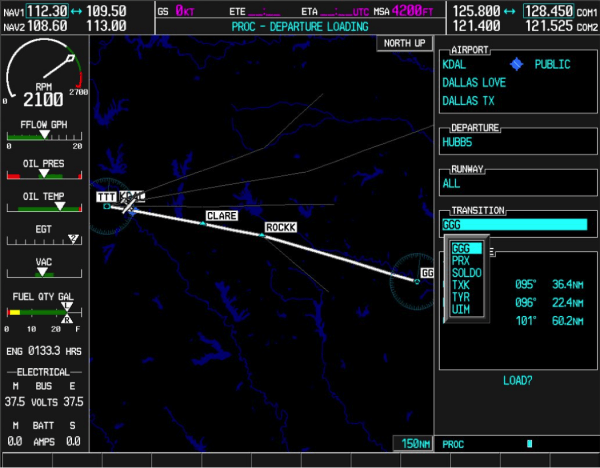
Now select the desired transition and press ENT. Press ENT again to load the departure into your active flight plan. Notice that some departures also require you to select a departure runway.
Loading an Airway
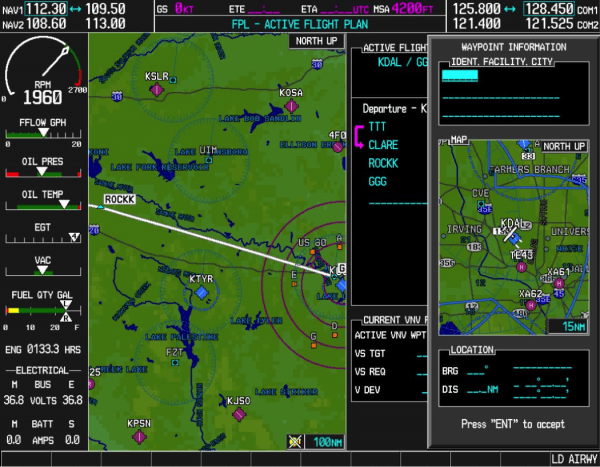
After loading the departure, the next step is to load the chosen airway. Loading an airway into the G1000 requires that you provide an entry point and select an exit point. We know that our entry point is the Gregg County VOR (GGG). It is already in the flight plan because it is a waypoint on the departure. Press the FMS knob to bring up the cursor on the active flight plan page. Use the large FMS knob to select the line under GGG in your flight plan, and turn the small FMS knob to the right as if you were going to enter another waypoint.
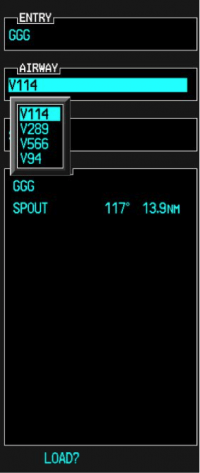
Pressing the LD AIRWY softkey at the bottom right corner of the MFD brings up the following window. Select the desired airway and press ENT.
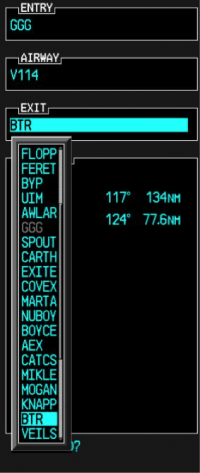
Now select the desired exit point from the airway. Notice that the fixes along the airway are arranged spatially around your entry point. In other words, SPOUT is closer to GGG than CARTH and so on. Keep going down the list until you find BTR; then press the ENT key.
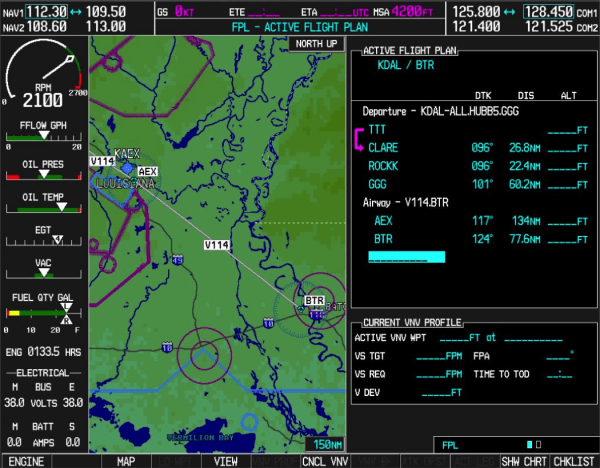
Press ENT again to load the airway into your active flight plan.
Loading an Arrival
The last step in loading our IFR flight plan into the G1000 is to load the arrival. Loading an arrival is almost exactly like loading a departure. However, do not manually enter your destination airport at this time. The G1000 automatically adds your destination airport as the final fix when you load an arrival.
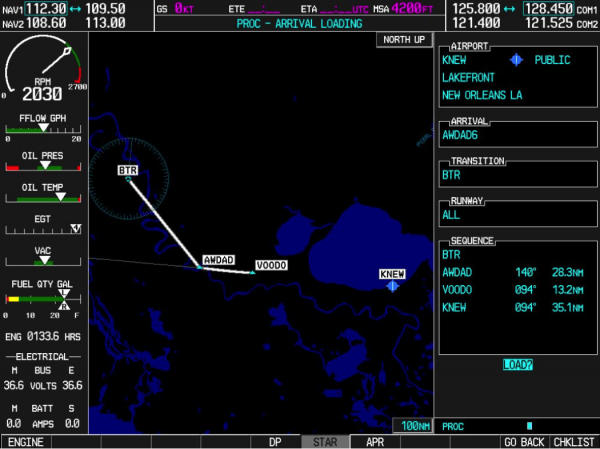
Press the PROC key on the MFD. Use the FMS knob to highlight SELECT ARRIVAL and press ENT. Use the FMS knob to enter your destination airport’s identifier and press ENT. Select the desired ARRIVAL and TRANSITION from the list. Press ENT to load the arrival. Notice that some arrivals require you to select which runway will be used.
Storing and Recalling a Flight Plan
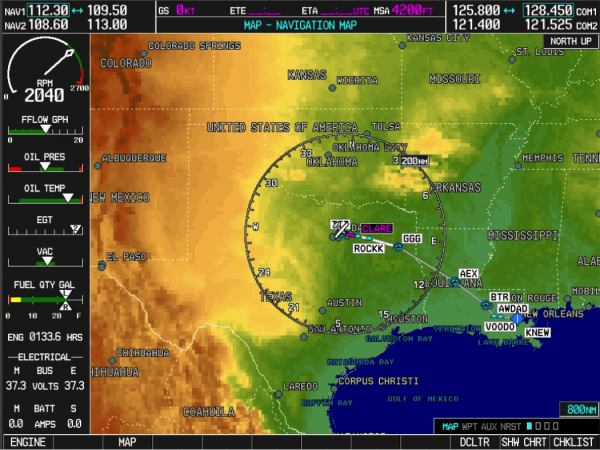
We have now finished loading our IFR flight plan into the G1000. It is good practice at this point to take an overall look at what you entered and make sure it is correct. See the picture below. If you are not ready to start your engine right now, you will want to be able to save your flight plan. Otherwise it will disappear when you turn off the master switch, and you will have to start all over.
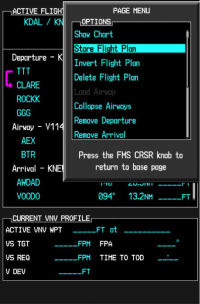
To store the flight plan, the active flight plan window has to be open. If it is not, press the FPL key to open it. Then press MENU, highlight Store Flight Plan with the FMS knob, and press ENT. Make a mental note of the flight plan number and press ENT to accept. Now you may safely turn off your master switch without losing all your hard work.
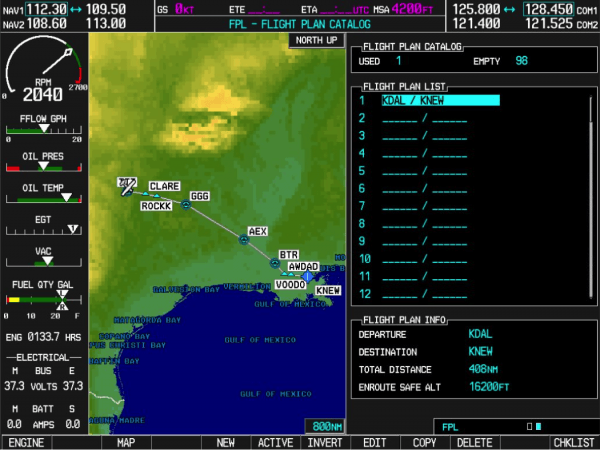
When you are ready to use your stored flight plan, press the FPL key on the MFD. Make sure the cursor is not flashing in the active flight plan window. If it is, you need to press the FMS knob before going to the next step. Turn the small FMS knob one click to the right to bring up the list of stored flight plans. Highlight the desired flight plan, press the ACTIVE softkey at the bottom of the MFD, and press ENT. You are now ready to go. Have a great flight!
Would you like more information?
Send us a message below.

